This post contains affiliate links. Read my disclosure policy here.

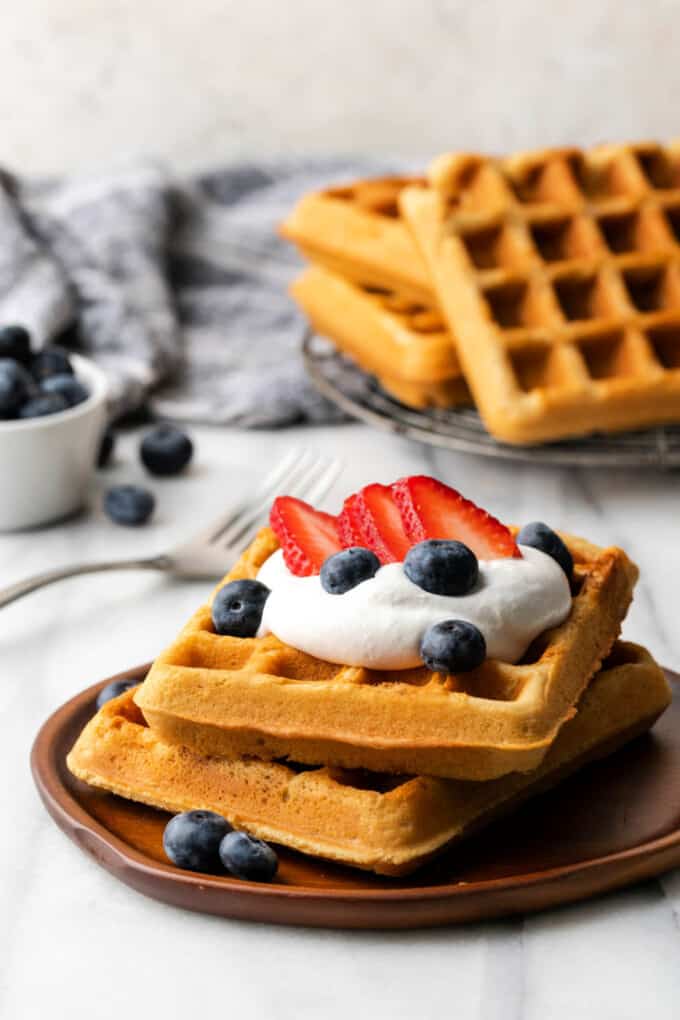
Learn how to make the best homemade Vegan Waffles that are perfectly crisp on the outside and fluffy on the inside. They are easy to make and require basic ingredients.

Forget about the store-bought frozen variety! You can make fresh Vegan Waffles that are far superior and less expensive at home.
They are perfect for a sit-down breakfast with your family and go wonderfully with tofu scramble, vegan bacon, and fresh orange juice. But they are also great for busy mornings. Just pop them in the toaster for a few minutes and breakfast is served!
This will be your favorite, go-to recipe that's easy, fool-proof, and so delicious. Your whole family will love them and when fall comes around, they can all enjoy these vegan pumpkin waffles!
Ingredients Needed + Additional Notes
This recipe requires just 9 simple ingredients that you probably have on hand. Here's what you'll need:
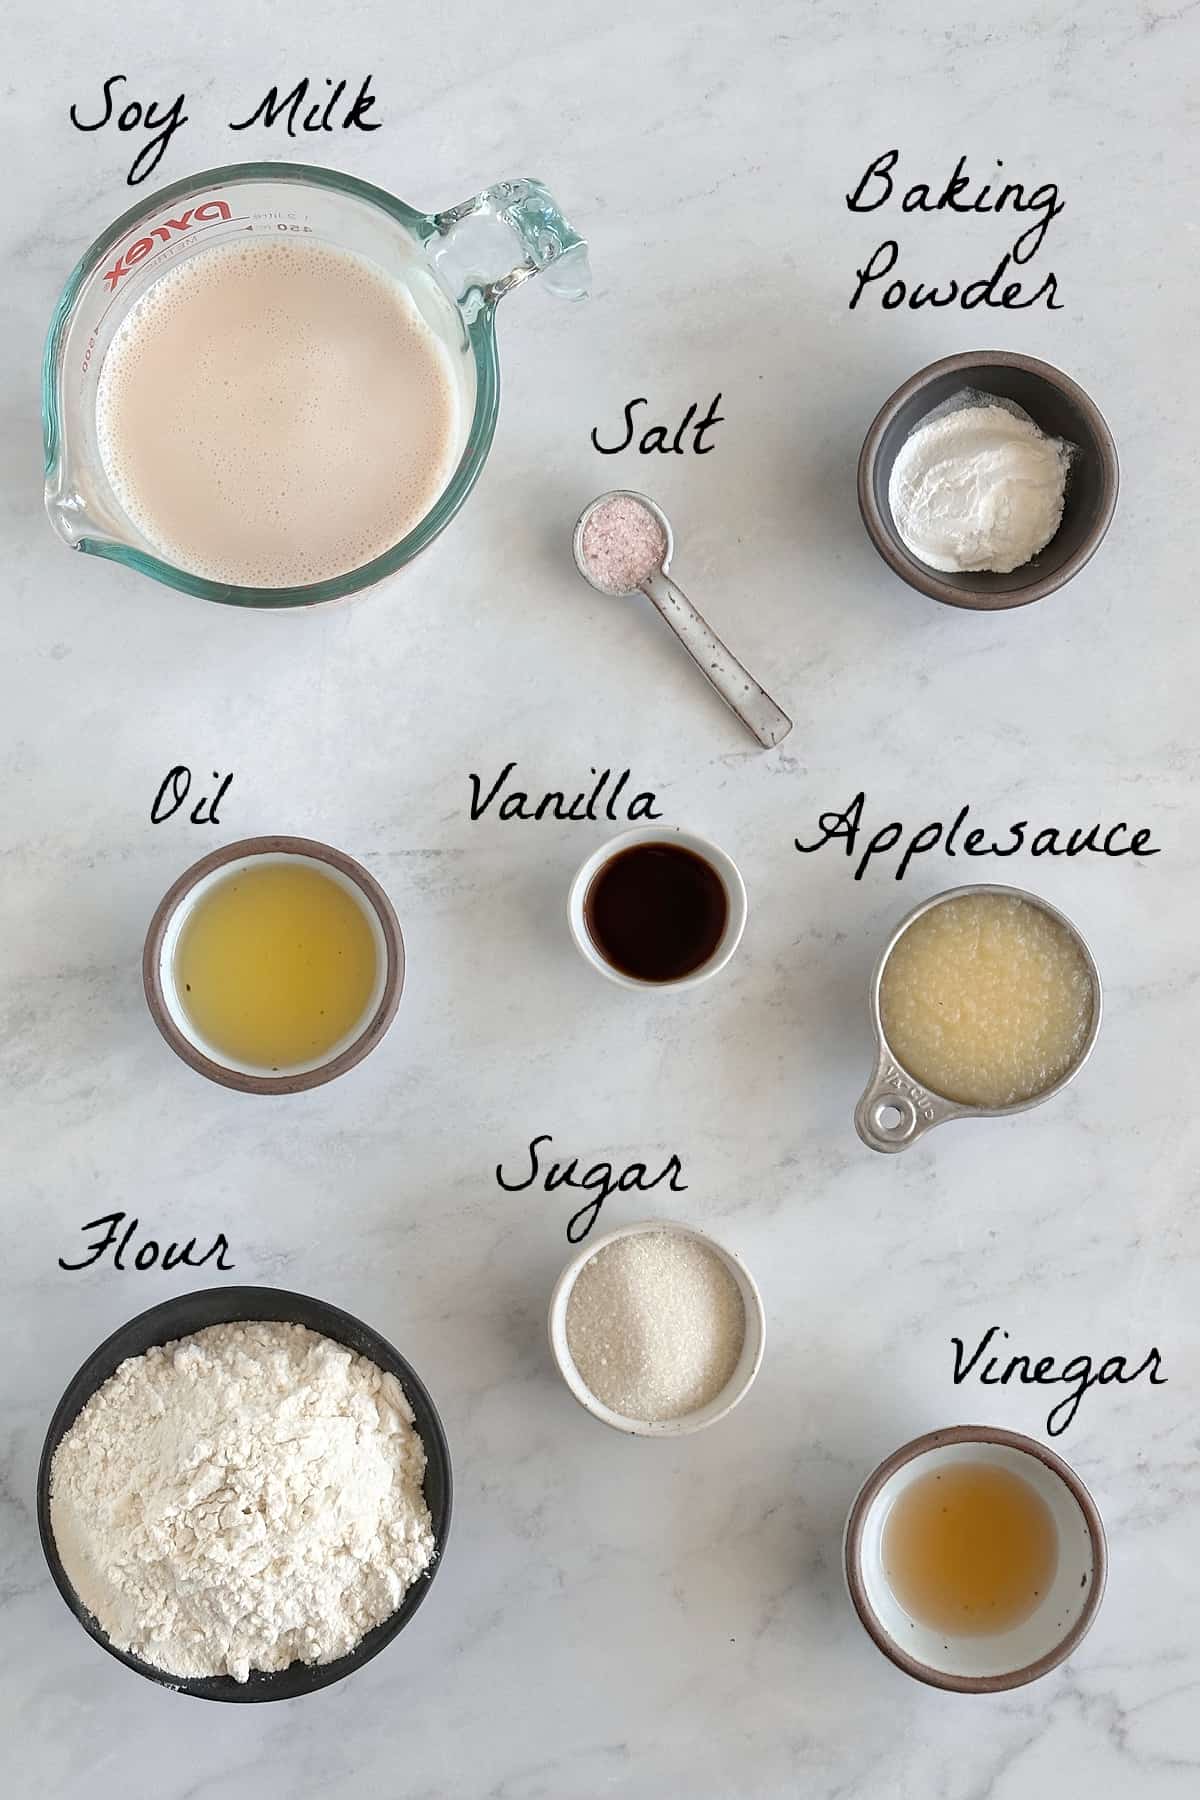
- Soy Milk - My next choice would be almond milk but try to choose one that has a thicker consistency
- Apple Cider Vinegar - You can also use fresh lemon juice.
- Neutral-Flavored Oil - I used avocado oil, but you can use any neutral oil you like such as canola, sunflower, grapeseed oil, or light-tasting olive oil.
- Applesauce - This is used instead of eggs and will help create a tender and fluffy texture.
- Vanilla Extract - This elevates everything and will make your house smell heavenly, but it's optional.
- All-Purpose Flour - I haven't tried this recipe with gluten-free flour yet, but I'd imagine a 1.1 all-purpose GF will work. Slight adjustments may be needed.
- Baking Powder - This will help create a golden crust with a light and airy inside.
- Cane Sugar - You can also use brown sugar or coconut sugar.
How to make them
Once you combine the batter, you are ready to roll! Here's a step-by-step visual showing you how to do it:
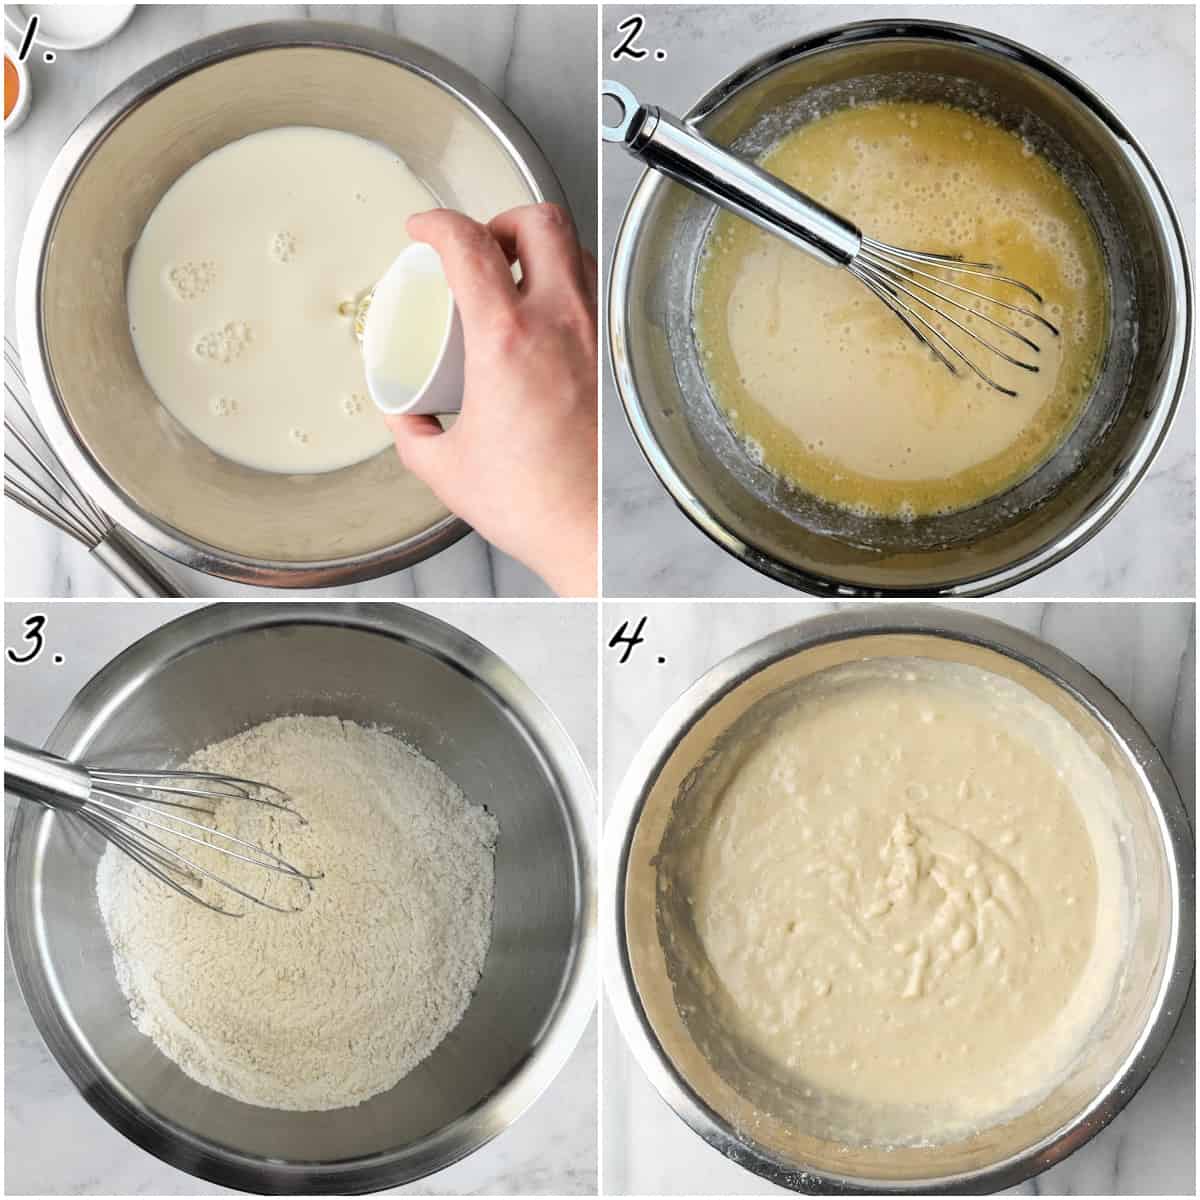
- Combine the soy milk and vinegar in a medium bowl. Let sit for 5 minutes to curdle. Preheat your waffle iron.
- Add the oil, applesauce, and vanilla to the buttermilk and whisk to combine.
- Whisk the flour, baking powder, sugar, and salt in a large bowl to combine.
- Pour the wet ingredients into the dry ingredients and whisk until just combined, being careful not to overmix.
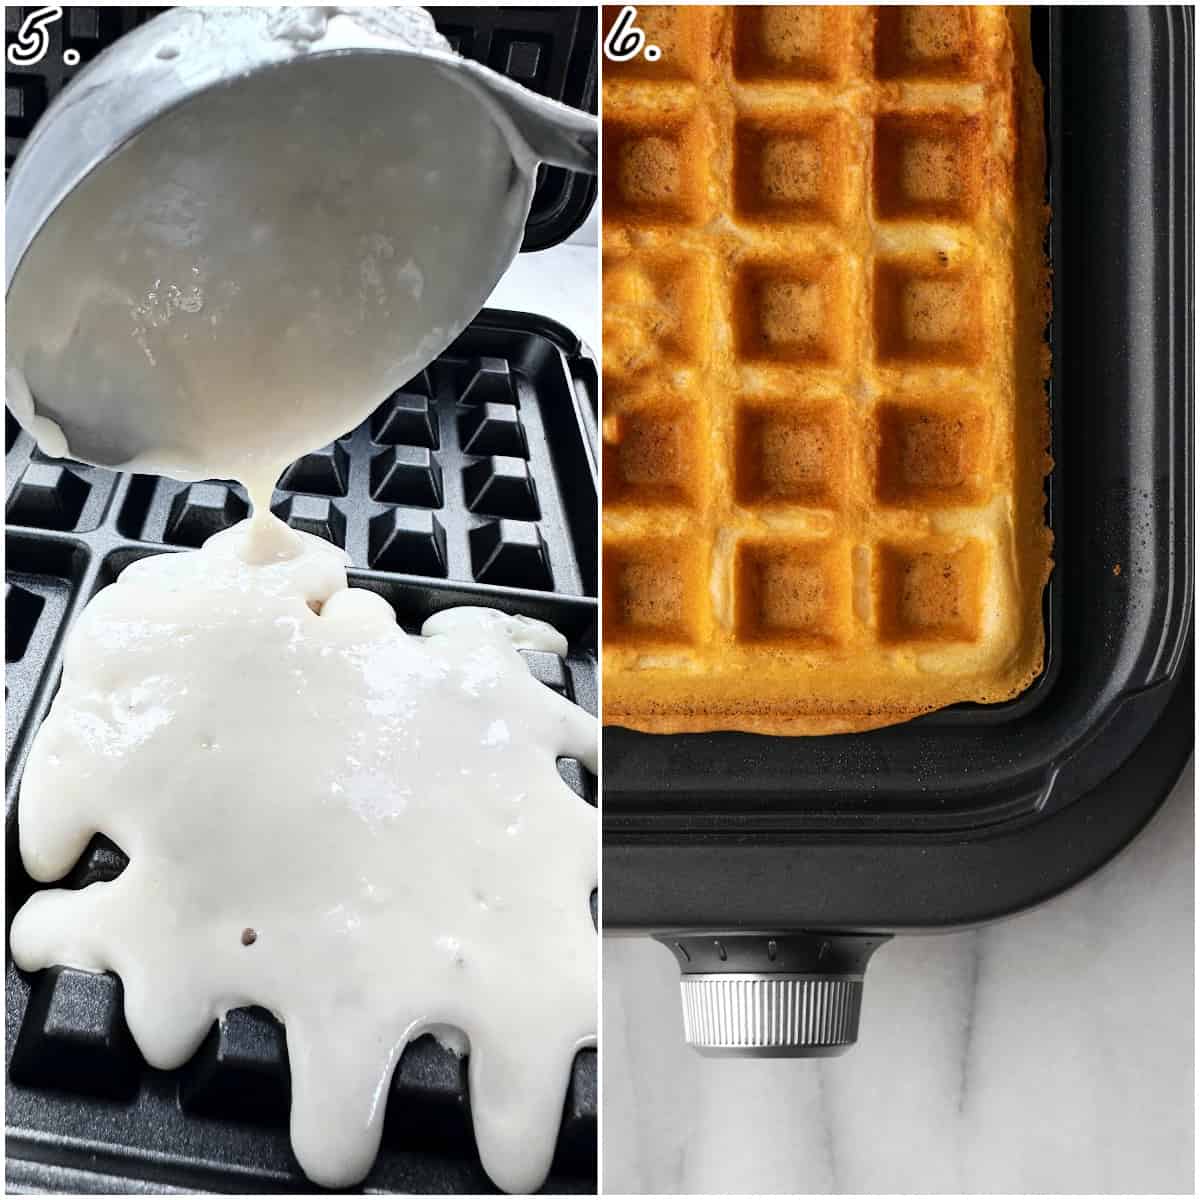
- If your iron is not non-stick, lightly spray it with cooking spray otherwise leave it bare. Spoon the amount of batter recommended by the manufacturer onto the hot iron plate.
- Cook according to the manufacturer's instructions until it's golden brown. Serve immediately.
Storing + Reheating
- Refrigerator - They will remain fresh for 3-4 days, stored in an airtight container or zip-top bag.
- Freezer - They can be stored for 2-3 months. Let them completely cool, then place them in a zip-top bag with wax paper in between each one, and gently release excess air before sealing.
- Reheat - The best and easiest way to reheat them is to just pop them in your toaster for a few minutes. They come out perfectly crispy!
FAQs
Some non-stick irons may not require greasing, while others may benefit from a light coating of cooking spray. Refer to the manufacturer's instructions for specific guidance.
Many models will signal when they are ready, but if you still see steam coming from it, that is a good indicator that they are not finished cooking and you should give it another minute until it's almost dissipated.
Set them on a cooling rack as soon as they come out of the waffle maker. This will let air circulate and reduce moisture buildup which will avoid them getting soggy.

More vegan breakfast recipes to try
Did you make this recipe? Let me know what you think by leaving a star ⭐️⭐️⭐️⭐️⭐️ rating and sharing your feedback in the comment section below. It would make my day!
⭐️ Subscribe to the Vegan Huggs Newsletter and receive weekly recipes straight to your inbox! You'll also receive my FREE eCookbook featuring my top 10 recipes.
Recipe

Vegan Waffles
Ingredients
- 1 ¾ cups soy milk , room temp (see note)
- 1 tablespoon apple cider vinegar (sub fresh lemon juice)
- ¼ cup neutral-flavored oil (avocado, canola, sunflower, grapeseed, or light-tasting olive oil)
- ¼ cup applesauce
- 2 ½ teaspoons vanilla extract
- 2 cups all-purpose flour
- 1 tablespoon baking powder
- 3 tablespoons cane sugar
- ¾ teaspoon sea salt
Recommended Equipment
- Waffle Maker
- Medium Mixing Bowl
- Large Mixing Bowl
- Whisk
Instructions
- In a medium bowl, stir together the soy milk and vinegar. Let sit for 5 minutes to curdle and slightly thicken.
- Preheat your waffle iron according to the manufacturer's instructions.
- In a large bowl, whisk the flour, baking powder, sugar, and salt to combine well.
- To the medium bowl with the buttermilk, add the oil, applesauce, and vanilla then whisk to combine well.
- Add the wet ingredients to the bowl of dry ingredients and whisk until just combined. Don't overmix. The batter will be thick and small lumps are fine.
- If your waffle iron is not non-stick, lightly spray it with nonstick cooking spray otherwise leave it bare.
- Spoon the amount of batter recommended by the manufacturer onto the hot waffle iron (typically, ¼-1/3 cup per waffle). Cook according to the manufacturer's instructions until the waffle is golden brown. Let the steam dissipate before opening the waffle maker.
- Serve immediately or set them on a cooling rack to allow air to circulate and reduce moisture buildup. To keep waffles warm, place them on an oven-safe cooling/baking rack in a 200°F preheated oven as soon as they come out of the waffle maker. Do not stack or overlap them.
Notes
-
- Soy Milk - I recommend this because the protein content helps yield a perfect vegan buttermilk when an acid is added. My next choice would be almond milk but try to choose a brand that has a thicker consistency. If your milk seems thin, reduce the amount by 2 tablespoons.
- Measure flour correctly by weighing it (250 g) or by using this spoon and level method: don't scoop the flour with a measuring cup directly from container. Just scoop it out of the container with a spoon and then into a measuring cup, without tapping or packing the cup. After filling, lightly sweep a butter knife across the top to remove excess flour.
- Every waffle maker is different with various cook times and amounts of batter to use. It's best to check the manual before beginning.
- Do not overmix the batter. Overmixing causes too much gluten to develop which can create a dense waffle.
- Recipe yields about 3 cups of batter which will make 8 4-inch waffles.
- See the post above for extra tips, FAQs, and step-by-step photos.

Vickie
These are the best vegan waffles we've ever had! I made them on Christmas morning for my grown kids who were visiting (also vegan) and they were blown away!
Melissa Huggins
Hi Vicki, This is such a great compliment! Thank you for making them and taking time to share feedback. 🙂
Vickie
These were amazing on Christmas morning! My family said they were the best waffles they ever had!
Melissa Huggins
Hi Vicki, I'm so happy everyone loved them. Thank you for sharing your wonderful feedback. Merry Christmas! 🙂
Leanne
This is my new go-to recipe! They came out tender with crispy edges and tasted so good. Thank you for another winner!
Katie
Thank you so much for this recipe. I've been craving classic-style waffles forever and the recipes I tried turned up flat. These are so easy and came out just how I remembered.
Melissa Huggins
Hi Katie, Your comment made my day! Thanks for trying them out and sharing your wonderful feedback. 🙂