This post contains affiliate links. Read my disclosure policy here.
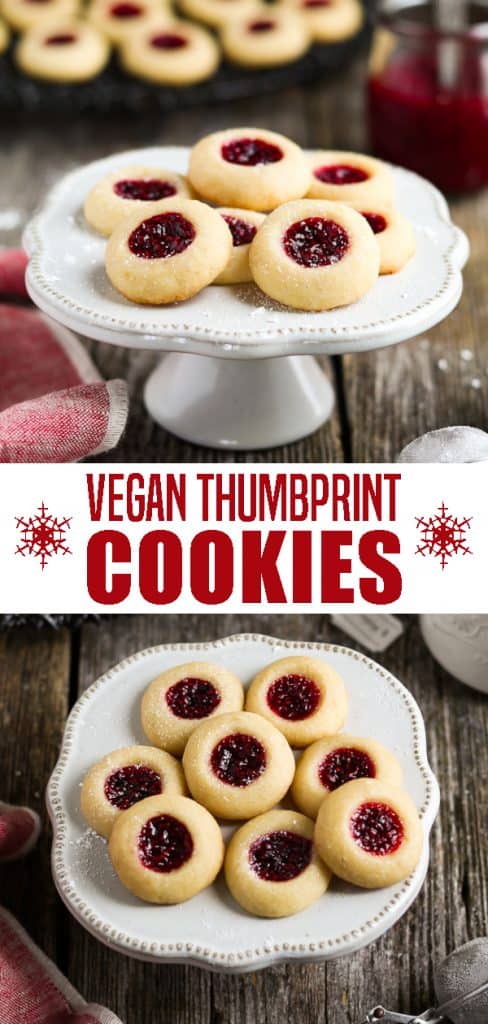
Vegan Thumbprint Cookies - The combination of tart jam and a buttery-sweet crumb is pure bliss in every bite.

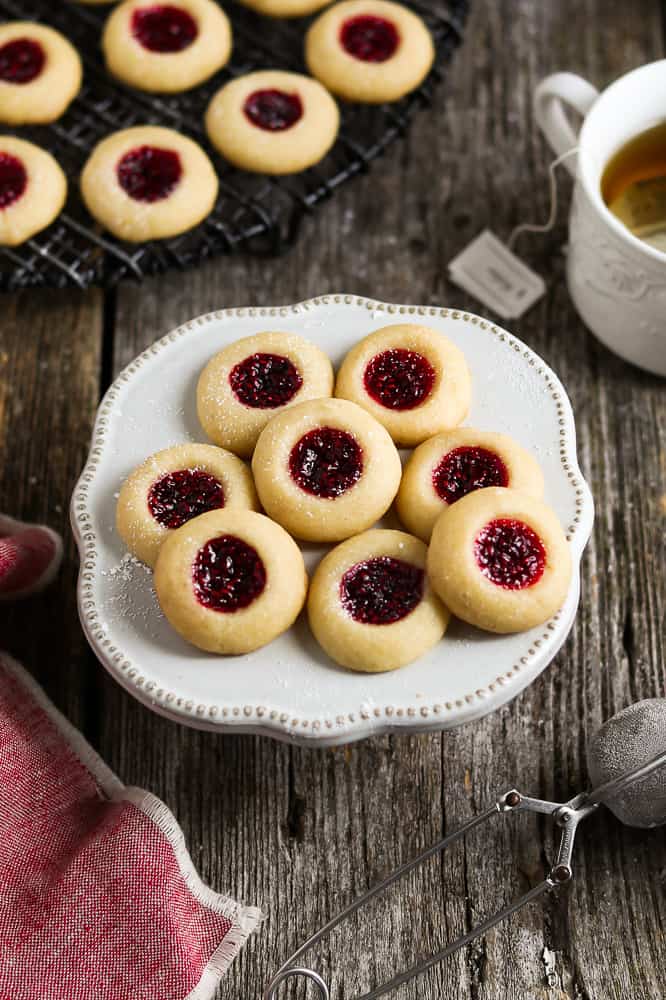
'Tis the season for everything festive and sweet! I'm up to my ears in cookies and I couldn't be happier! My go-to holiday cookies are these Jam-Filled Vegan Thumprint Cookies.
I give them out every year along with Hot Chocolate on a Stick and Cookies in a Jar. They bring tons of smiles and that's what matters.
This recipe was posted back in 2016 and I felt it needed fresh new photos and easy-to-follow instructions. The cookies are still amazingly delicious!
How to make Vegan Thumbprint Cookies
(full instructions and notes in recipe card below)
- First, whisk the flour and salt together and set aside.
- Now add slightly softened vegan butter to the bowl of a Stand Mixer and beat until creamy. Add the sugar and beat until incorporated and scrape down sides as needed.
- Add the vanilla and almond extract then mix until combined.
- On low speed, gradually add the dry ingredients and mix until dough starts to form. *Don't over mix.

- Add almond milk and mix on low to combine.
- Scoop the dough and roll it into smooth ball-shape. Place on your baking sheet about 1 ½ " apart.
- Make the indentations by using the back of a ¼ teaspoon and press down gently about ½ way in.
- Spoon jam into each well using a small spoon or you can pipe it in.
- Now bake in the oven until barely lightly golden about 13-15 minutes. Baking too long will make them crispy. Carefully check the bottom of one cookie - it should be lightly golden.
- Let cool on pan for 10 minutes before transferring them to a cooling rack.
Tip: I found that the dough cracked less if I made the indentation right after rolling each ball, instead of rolling them all first. If you do see a few cracks, just gently smooth them out with you finger or just leave them be. Small cracks are completely normal and add character.

Do I need an electric mixer to make Thumbprint Cookies?
No, you can do it all by hand and the cookies will still be delicious. They might be a hair less fluffy, but it's not a notable difference.
Here's what you'll need to do:
STEP 1: You'll need to soften the butter enough that you can work with it by hand. However, you don't want it to be melty.
STEP 2: In a medium bowl, whisk the flour and together. Set aside.
STEP 3: Place the butter in a large bowl and break it down with a wooden spoon or silicone spatula. Mix it for about a minute to get a creamy texture.
STEP 4: Add your sugar and mash it together with the butter using a large fork. Now, start whipping it until it's soft and fluffy. Add the extracts and whip to combine.
STEPS 5: Add the flour into the butter/sugar mixture and mix until just combined (don't overwork). Add the non-dairy milk and mix until a dough is formed. If it's too dry or crumbly, add another teaspoon of milk. Now you can make the cookies following the instructions in the recipe card.
Do I need to chill cookie dough?
That's the million dollar question! Most of the time, it's safest to do so. Especially, if the recipe calls for it. However, I rarely chill the dough for this recipe. I work fairly quickly and never feel that my dough is too soft.
I use a Marble Pastry Slab to keep it cool while I'm rolling the balls. If by chance the dough feels soft or sticky, I'll wrap it in cling wrap and chill for 15-20 minutes.
If the dough isn't rolling easily into a ball shape or holding its shape, then the dough is too soft and you should chill it.
Are you guys ready? Let's do this!
I'd love to hear from you
If you make these Vegan Thumbprint Cookies, let me know what you think by ★ star rating it and leaving a comment below. It would really make my day. You can also follow me on Instagram and share your creation with me. Just tag me @veganhuggs and hashtag #veganhuggs so I don't miss it.
Recipe

Vegan Thumbprint Cookies with Raspberry Jam
Ingredients
- 2 cups all-purpose flour *see notes for proper measuring
- ½ teaspoon salt
- ½ cup granulated sugar
- ¾ cup vegan stick buter , slightly softened
- 2 tablespoons almond milk , or any plant-based milk
- 1 teaspoon vanilla extract
- ½ teaspoon almond extract (optional)
- ⅓ cup Homemade Raspberry Jam , or any jam
- *Optional: powdered sugar for sprinkling
Instructions
- Preheat oven to 350°F (177 °C). Line 1 extra large baking sheet (or 2 medium) with parchment paper. Set aside.
- In a medium bowl, whisk flour and salt together to combine well.
- Add the softened vegan butter to the bowl of a Stand Mixer and fit with a paddle attachment (or use a medium/large stainless steel bowl with a Hand Mixer). Beat on medium until creamy for 30 seconds.
- Add the sugar and beat on medium until incorporated (about 30-60 seconds). Scrape down sides as needed. Now add the vanilla and almond extract and mix on medium until combined (about 30 seconds).
- Turn to low speed and gradually add the flour and mix until just combined and dough starts to form (about 30-60 seconds) *Don't over mix. Scrape down sides as needed. Now add the 2 tablespoons of almond milk and mix on low to combine.
- Using a half-tablespoon measuring spoon, scoop the dough and roll into smooth balls. Then place them on your baking sheet about 1 ½ inches apart (try to keep the dough around the same measurement for even baking and prettier cookies).
- Now, you can make the indentations by using the back of a ¼ teaspoon (or your index finger). Press down gently about ½ way in (not too far or the jam will come out the bottom). (*Some cracks are normal and you can gently smooth them with your fingers or leave them there)
- Using a small spoon (or piping bag), fill each cookie with jam (don't overfill or it will spill out during baking).
- Bake in the oven until barely lightly golden about 13-15 minutes (baking too long will make them crispy). Carefully check the bottom of a cookie - it should be lightly golden. Remove from oven and let cool on baking sheet for 5-10 minutes before transferring them to a cooling rack for another 10 minutes. Dust with powdered sugar if desired.
Notes
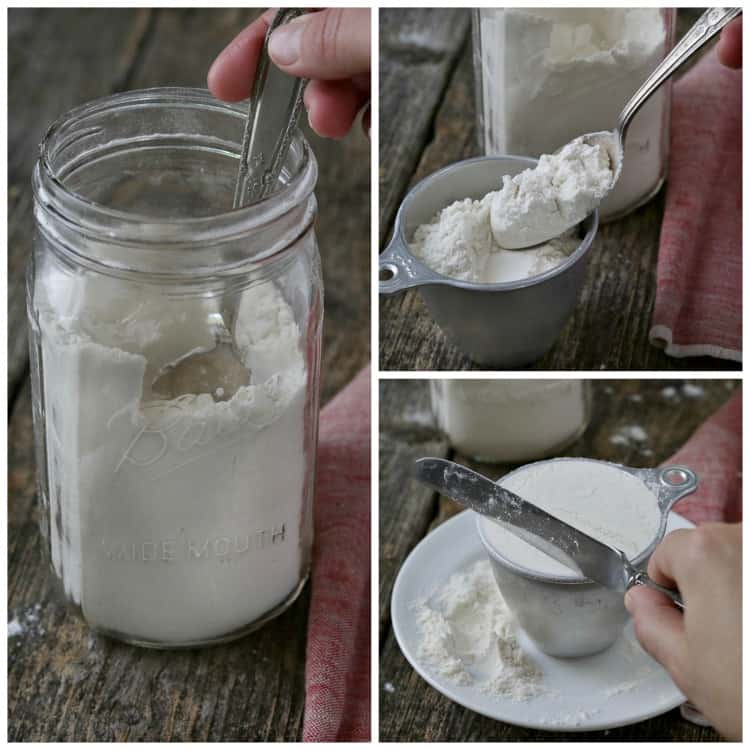
- For accurate results, don't scoop the flour with a measuring cup directly from the flour container. Instead, scoop the flour out of your container with a spoon and then into a measuring cup. Don't pack or tap the cup. After filling, lightly sweep a butter knife across the top to remove the excess flour. * Example photo below recipe card.
- If your dough is too soft or sticky to work with, wrap it in cling wrap and chill for 15-20 minutes. The dough will soften again as you're rolling the balls. Make sure the dough balls are smooth to avoid cracking.
- If your dough is dry or crumbly, you can add ½ teaspoon of non-dairy milk and gently work it in until just combined. Add more if needed.
- Keep stored in an airtight container for 5-7 days.
- I found that the dough cracked less if I made the indentation right after rolling each ball, instead of rolling them all first. If you do see a few cracks, just gently smooth them out with you finger or just leave them be.
- If you don't have an electric mixer, check post above for instructions.
- Makes approximately 40 cookies.
Nutrition


Gigi
Hi! What vegan butter do you use or recommend for making these ? Thank you ! Can’t wait to try the recipe
Melissa Huggins
Hi Gigi, I like to use firm stick butter from Earth Balance or Miyoko's. I hope this helps. Thanks for stopping by 🙂
Penny
Easy and delicious little biscuits. Love them.
Support @ Vegan Huggs
Hi Penny! We're so happy you like the cookies! Thank you for stopping by 🙂
Sarah
These are the best cookies I've ever made and so simple! I've made them 3 weeks in a row. Thank you!
Support @ Vegan Huggs
Hi Sarah! Wow we are so happy to hear that - what a compliment! Thank you so much for stopping by 🙂
Jeanell
Delicious! I had made cranberry jam with orange zest and used that for the filling. I drizzled the cookies at the end with a mixture of powdered sugar, vegan milk and almond extract. I'm excited to try different variations. Thank you for a wonderful and easy recipe!
Support @ Vegan Huggs
Hi Jeanell! We are so happy to hear that you loved the recipe - homemade cranberry jam sounds delicious for these too! Thanks for giving it a try 🙂
Fran
These cookies are very good, the dough is very easy to work with. I put the jam in after the cookies baked.
Support @ Vegan Huggs
Hi Fran! We are so happy to hear that you loved the cookies 🙂 Thanks for trying them out!
Andrea C.
My daughter introduced me to these cookies and I am obsessed. They are the most delicious cookies I have ever made and tasted. They stay soft and I make them to give as gifts. No one would ever know they were vegan if you didn't tell them.. Delicious!!
Support @ Vegan Huggs
Hi Andrea! We are so happy to hear that you and your daughter both love the cookies! Thanks so much for stopping by 🙂
Debi Allen
These were a hit in my household!! They didn't make it through the day, lol. ...and I made a double batch!! I think I need to make more!!
Support @ Vegan Huggs
Hi Debi! We are so happy to hear that they went so fast and that you all loved them! Thanks for trying the recipe 🙂
Midori
Love this recipe. The cookies turn out so good, good to double it! One thing is, I bake by weight and really appreciate the metric option, though I've noticed your metric button doesn't always work for me. When i click it, the page just reloads.
Peggy
Hi,
I am going to make these tomorrow. Can I use coconut oil instead of vegan butter.
Thanks,
Olivia Chovan
I just made these for the first time and oh my gawd! They are absolutely divine! These are definitely the BEST vegan Christmas cookies any of us (including our Bob-vegan family) has ever had! I used Miyoko’s cultured cashew butter and I really think that made it! Definitely give this recipe a 10 out of 10! Thank you for sharing this with the world and my family ♥️🙌
Olivia Chovan
Ooos, I meant to write “non-vegan”
Support @ Vegan Huggs
Hi Olivia! Yay! We are so happy to hear that the recipe was a hit even among the non-vegans! Thanks so much for stopping by 🙂
Etta P
My sister is vegan and Although I am a professional baker, vegan items are not my specialty. These cookies were simple to put together, turned out beautifully, and are very addictive! I added the zest of two lemons and substituted lemon juice for the almond milk since we only keep cow milk in the house. I also used fig butter to fill them since that’s what I had on hand. They were DELICIOUS and what an adaptable recipe!
Support @ Vegan Huggs
Hi Etta! What unique substitutions to use - that so great! We are so happy to hear that you loved the recipe, thank you for trying it out! 🙂
P
hi do you think I would be able to use gluten-free 1:1 flour for this recipe?
Melissa Huggins
Hi there, I haven't tried it yet, but I would use the 1.1 GF all-purpose as you mentioned. I'd love to hear how they turn out if you try them. Thanks for stopping by 🙂
Dorothy
Delicious! I used Earth Balance vegan butter and added the almond extract. Only wish I had doubled the recipe because these were gobbled up quickly! I found that they needed to cook the full 15 minutes and even then they weren't at all golden.
Support @ Vegan Huggs
Hi Dorothy! Amazing! We're so happy to hear that you loved the cookies! Every oven is different so it definitely is good to keep an eye on the bake time until they are just right for you! Thanks so much for trying out the recipe 🙂
Deb
I want to make these tomorrow. They look wonderful. I have raspberry preserves in the fridge...will that work rather then jam? Thanks!
Melissa Huggins
Hi Deb, yes, raspberry preserves will work nicely too. Thank you for giving them a try. 🙂
Aimee B.
Made these today and they are super easy and delicious. I baked them in my toaster oven for about 9-10 minutes and that was perfect. 🙂
Support @ Vegan Huggs
Hi Aimee! So cool that you bake them in your toaster oven! We are so glad that you loved them, thanks for stopping by 🙂
Cyndi
Can these be frozen?
Melissa Huggins
Hi Cyndi, yes, they freeze really well for 2-3 months. 🙂
Fatiha
Hello I haven’t tried the recipe yet! But I was wondering if I could replace some of the flour with almond flour ? And if yes what ratio would work. Thank you