This post contains affiliate links. Read my disclosure policy here.
Learn how to make the ultimate homemade vegan vanilla ice cream that's rich, ultra-creamy, and perfectly sweet. With simple ingredients and an ice cream maker, you'll create a deliciously dairy-free treat that everyone will love!

Making your own vegan vanilla ice cream at home is a simple process and tastes so much better than store-bought in my humble opinion. Plus, it's fun to make!
This recipe uses coconut milk and cashews to create a creamy and rich base that rivals traditional dairy ice cream. It's sure to satisfy your sweet tooth, too.
Using an ice cream maker ensures that your ice cream will be smooth and perfectly churned, giving you a professional-quality dessert right at home. We get lots of use out of ours and besides the vanilla flavor, my vegan chocolate ice cream, and vegan strawberry ice cream are always in rotation.
Ingredients Needed
With just 6 simple ingredients, you’ll be enjoying your own homemade vegan vanilla ice cream in no time. Here's what you'll need:
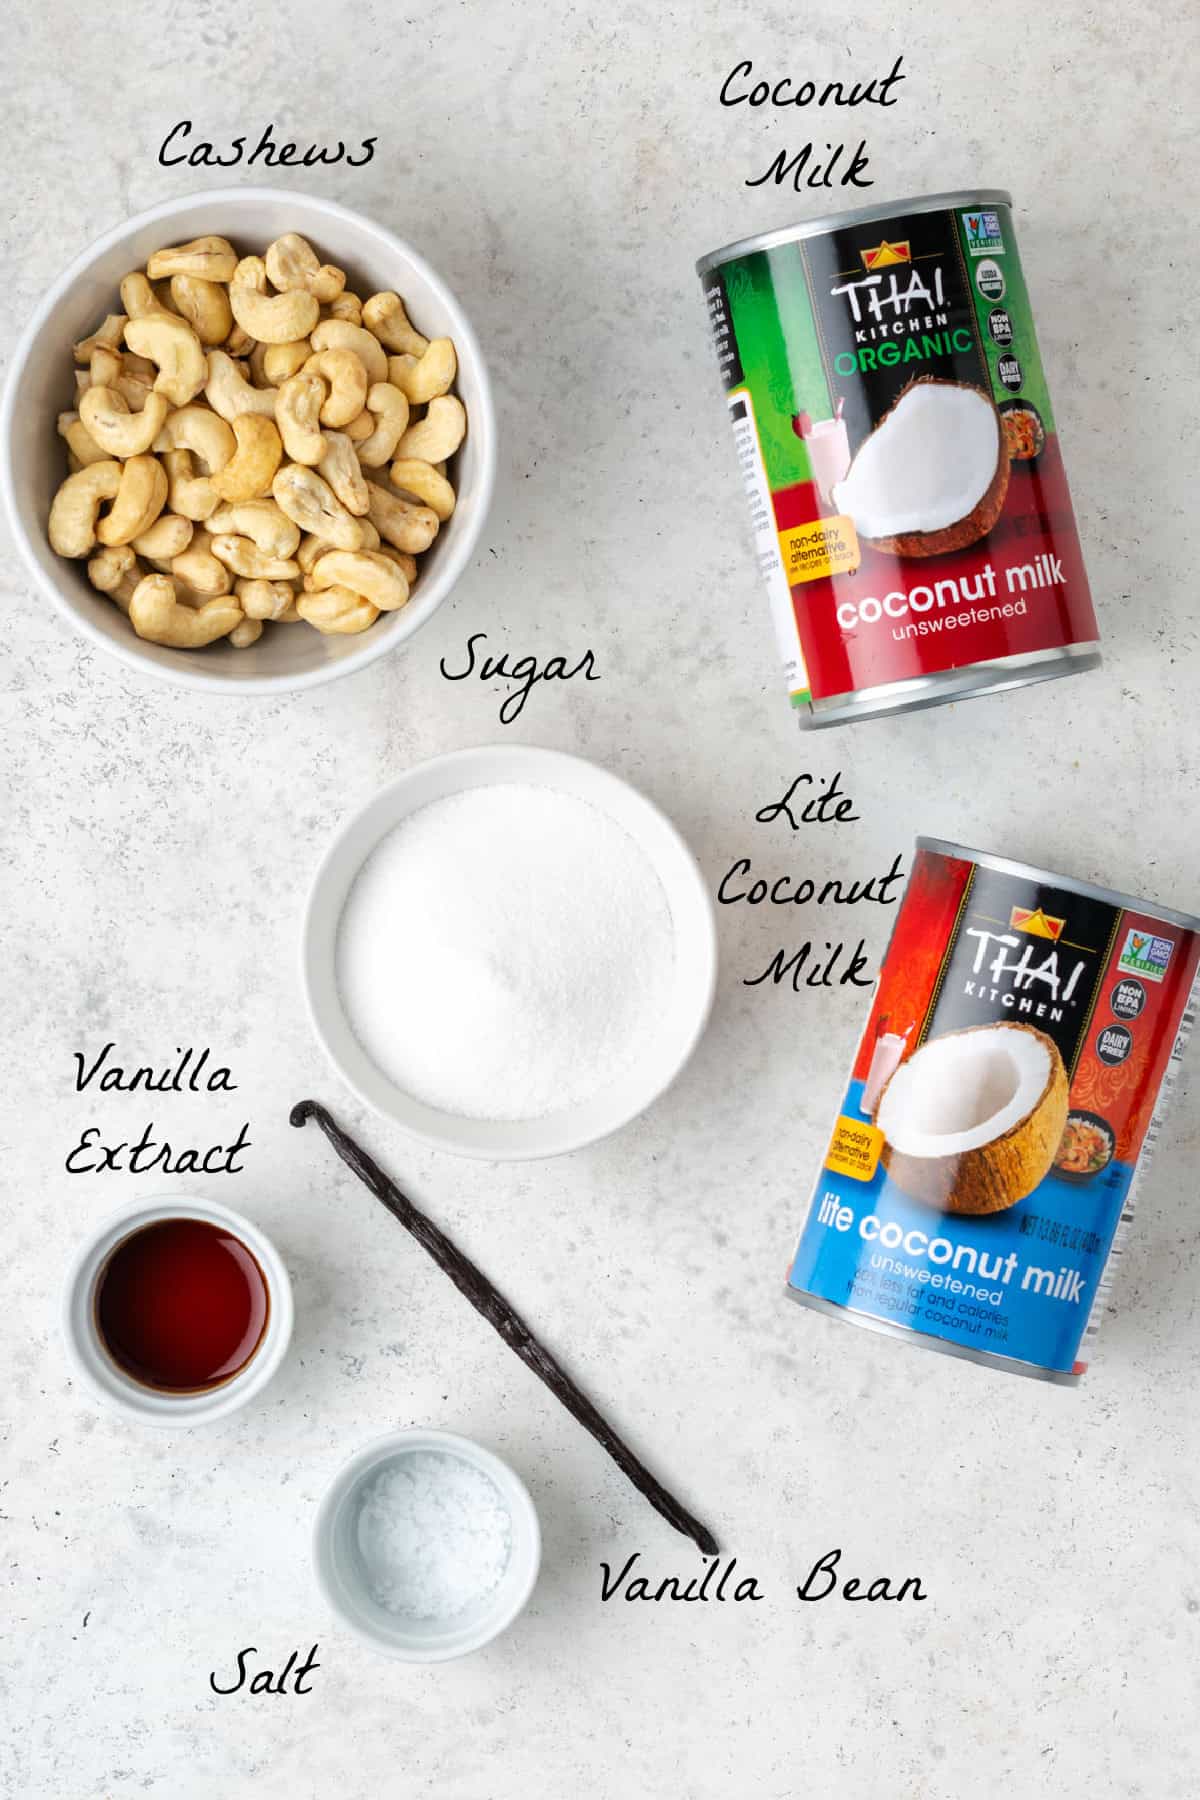
- Raw Unsalted Cashews - They are neutral in flavor and help create a rich and creamy base. I recommend using whole cashews instead of pieces because they tend to be fresher.
- Coconut Milk - I used a combination of full-fat and lite. The full-fat delivers a luxurious, creamy base reminiscent of dairy, while lite coconut milk provides a slightly lighter texture without compromising creaminess.
- Cane Sugar - You can use agave nectar as well. Maple syrup works too but will impart a stronger flavor.
- Vanilla Extract - I don't recommend using imitation vanilla for this recipe. The flavor is too powerful.
- Vanilla Bean - You can also use vanilla paste or more vanilla extract if you don't have either.
- Sea Salt
Step-by-step process
Here's a quick visual on how to make this vanilla ice cream. Scroll to the recipe card below for the full printable recipe.
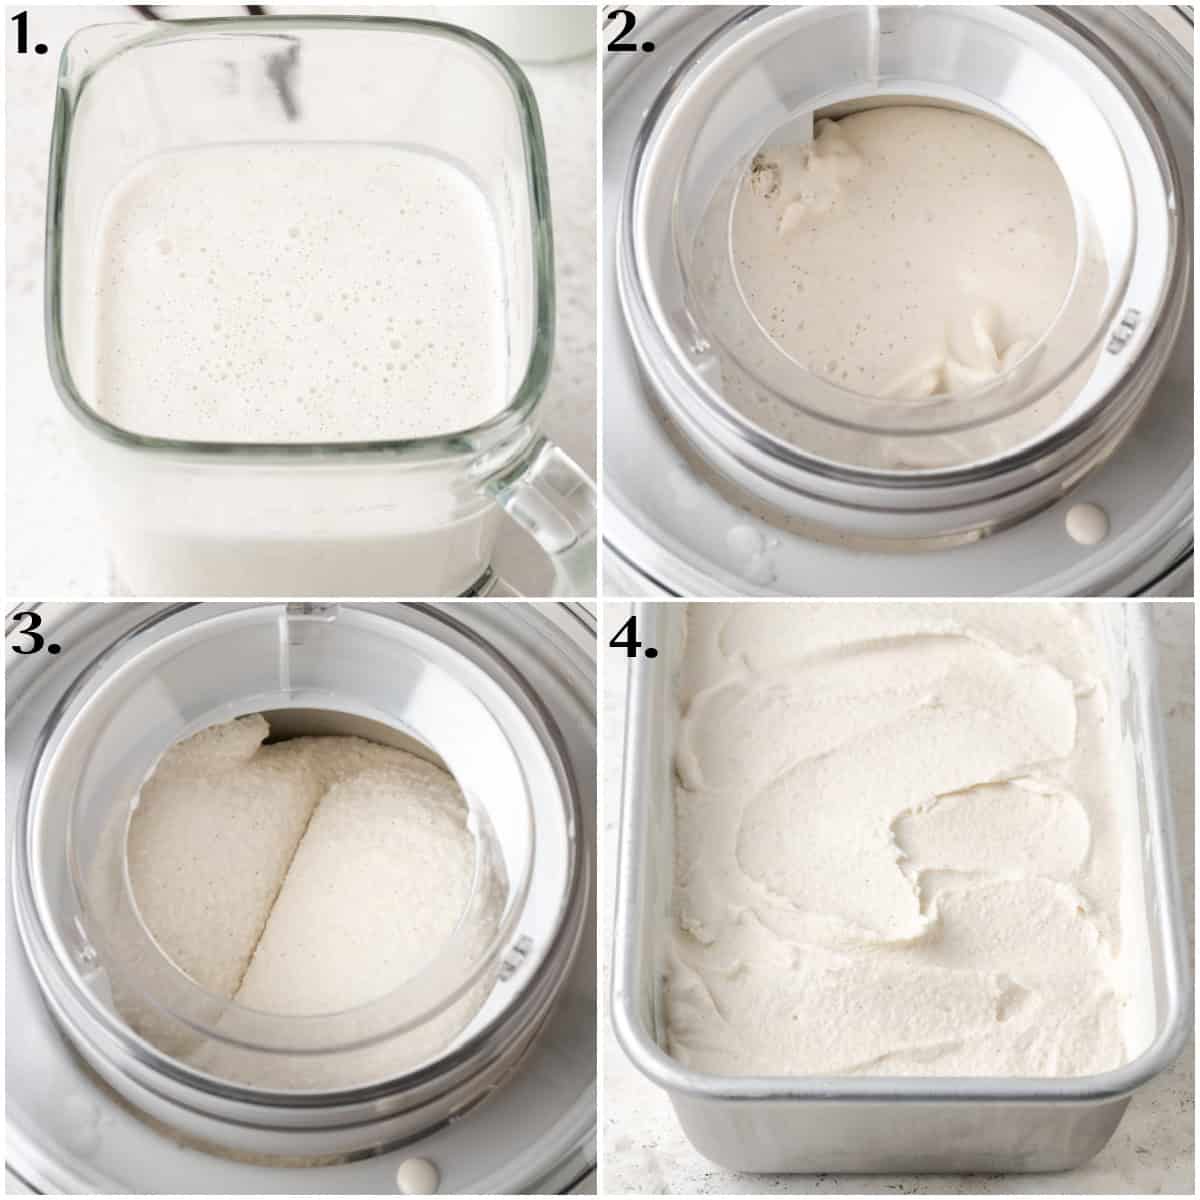
- Add the cashews, coconut milk, sugar, vanilla bean, vanilla, and salt to your blender. Blend on high until completely smooth. Cover and place in the fridge for 4-6 hours, or overnight. It should be very cold!
- Once chilled, add the mixture to your ice cream maker and churn according to the manufacturer’s instructions.
- It should take between 20-30 minutes to churn. The mixture will thicken and look like a soft serve when it's done.
- Using a rubber spatula, transfer the ice cream to a large, freezer-safe container with a lid, smooth the top, and cover. Freeze it for at least 3 to 6 hours, or until it is firm.
FAQs
Yes, you can add about ½-1 cup of mix-ins during the last few minutes of churning. Chill the mix-ins beforehand if possible so the ice cream doesn't melt. Avoid adding large pieces, as they may strain your machine.
The sky's the limit here! You can add various things such as nuts, berries, cookie dough, crushed cookies, marshmallows, chocolate chips, and more.
Did you make this recipe? Let me know what you think by leaving a star ⭐️⭐️⭐️⭐️⭐️ rating and sharing your feedback in the comment section below. It would make my day!
⭐️ Subscribe to the Vegan Huggs Newsletter and receive weekly recipes straight to your inbox! You'll also receive my FREE eCookbook featuring my top 10 recipes.
Recipe
Vegan Vanilla Ice Cream
Ingredients
- 1 cup raw cashews
- 14 oz full-fat coconut milk (1.5 cups)
- 14 oz lite coconut milk (1.5 cups)
- ¾ cup cane sugar
- 1 teaspoon vanilla extract
- 1 vanilla bean pod , halved and seeds scraped (*optional)
- ½ teaspoon sea salt
Recommended Equipment
- Freezer-Safe Container with Lid
Instructions
- Your ice cream maker base should be completely frozen before beginning. I usually put mine in the freezer the night before.
- If you don't have a high-powered blender (like a Vitamix), you must first soften the cashews. To soften, boil water in a small pot and remove from heat. Add cashews and cover for 20 minutes. Then drain, rinse, and discard soaking water.
- Add the cashews, coconut milk, sugar, vanilla extract, scraped vanilla bean (not the pod), and salt to your blender. Blend on high until completely smooth. Cover and place in the coldest part of your fridge. Chill for at least 4-6 hours, or overnight. It should be very cold!
- Once chilled, add the mixture to your ice cream maker and churn according to the manufacturer’s instructions. It should usually take between 20-30 minutes. The mixture will thicken and look like soft serve when it's done.
- Using a rubber spatula, transfer the ice cream to a large, freezer-safe container with a lid, smooth the top, and cover. Freeze it for at least 3 to 6 hours, or until it is firm. If you don't have a container with a lid, cover it tightly with plastic wrap.
- To serve, let the ice cream thaw at room temp for about 10-15 minutes to slightly soften. Before freezing again, cover the surface of the ice cream with wax paper or plastic wrap and then cover with the lid. This will prevent ice crystals from forming.
Notes
- Avoid overfilling your ice cream maker bowl to prevent overflow as it thickens. Refer to your instruction manual for the maximum fill line.
- The ice cream will last about 2 weeks as long as it's stored in an airtight container. It helps to cover the surface with wax paper to avoid ice crystals from forming.
- The flavor of this ice cream will have a subtle coconut undertone. The cashews seem to balance it out a bit so it doesn't overpower.
- See the post above for step-by-step photos, extra tips, and FAQs




Joyce
I've made this recipe several times and love it. Sometimes I'll add vegan chocolate chips to it, other times I'll leave it just the way the recipe is.
Today, however, I've decided to add a can of pumpkin and about 2T of pumpkin pue spice to try something different for the fall season. 😋 I'll know tonight how it turns out.
Melissa Huggins
Hi Joyce, I'm so happy you love the recipe. Sounds so good with the chocolate chip and the pumpkin spice version sounds amazing. Hope it worked well. Thank you for sharing feedback. 🙂