This post contains affiliate links. Read my disclosure policy here.
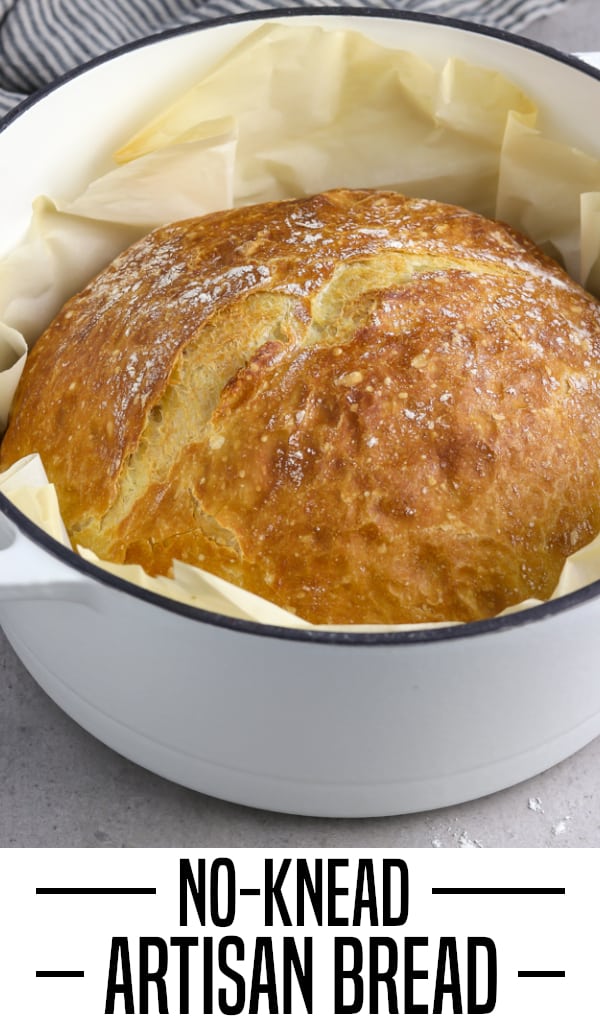
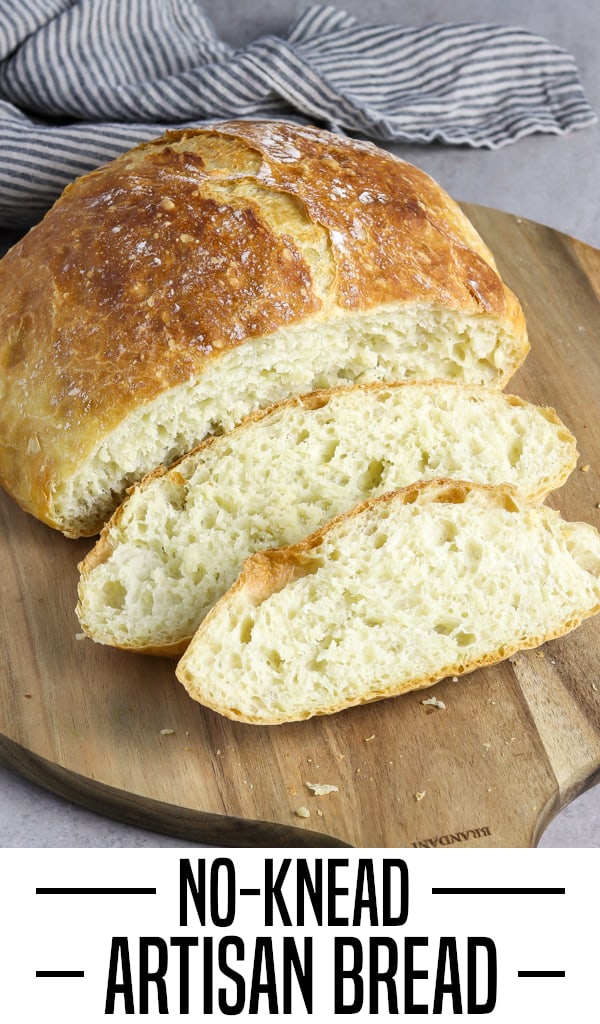
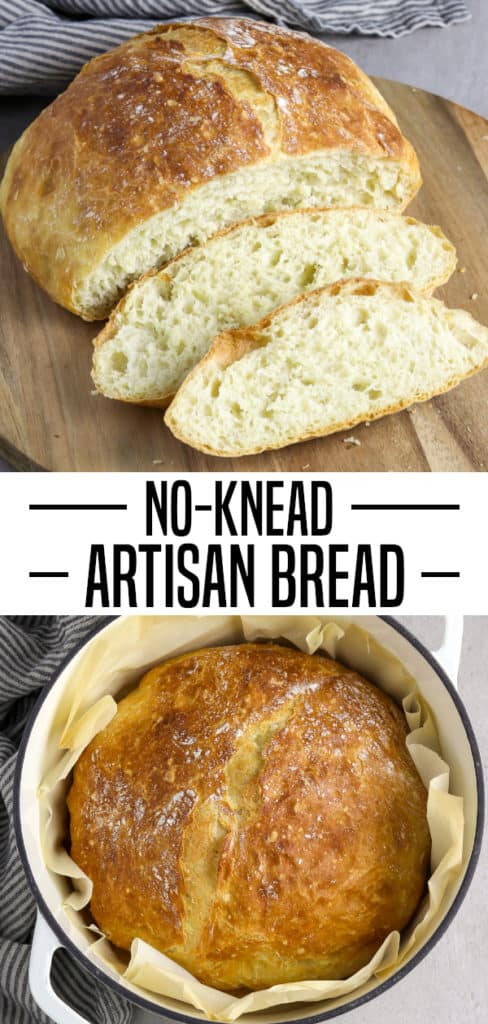
With just 4 simple ingredients, you can make this No Knead Artisan Bread Recipe. It's surprisingly easy to make, too - just make the dough, let it rest, then bake it in the oven for 40 minutes. No kneading involved! The crust is golden and crackly, while the inside is soft and fluffy.

Did you know that you can make delicious, bakery-style, no knead bread with little effort? I kid you not - all you'll need is a few pantry staples and a dutch oven (or something similar). It's almost impossible to mess up!
This super-simple method was originally created by Jim Lahey (owner of Sullivan Street Bakery) and the world is a better place because of it! This recipe has been adapted thousands of times and shared all across the internet. Bread really brings people together!
This recipe is fuss-free and mostly hands-off. The hardest part is just waiting for the dough to rest which takes 3 ½ hours. Jim's original recipe has a longer rest time, but I found this recreation of his recipe with a quicker time, so I tried it out and it worked perfectly.
My family loved it! We had it with my Vegan Carbonara and used the leftovers for Chickpea Tuna Salad Sandwiches. It's fantastic with my Creamy Tomato Butter Beans recipe too. It's so versatile!
So, are you ready to give this a try? Here's what you'll need...

Ingredients needed:
(FULL AMOUNTS IN RECIPE CARD BELOW)
- All-purpose flour
- Sea salt
- Instant dry yeast
- Water (hot)
How to make Artisan Bread

- 1 - Whisk together the flour, salt, and yeast in a large bowl until combined.
- 2 - Stir in the hot water until just combined and a sticky and shaggy dough forms. Don't overwork the dough. Use a spatula to scrape the sides if needed.
- 3 - Cover with plastic wrap or a towel and place in a warm spot in your kitchen. Let the dough rest for 3 hours. The dough will puff up and will be covered in bubbles (photo #3 shows what the dough looks like after 3 hours).

- 4 - Liberally flour your work surface. Using a spatula, scrape the dough onto work surface and sprinkle top with flour. Using a bench scraper or floured hands, fold the dough in towards the center about 6-8 times. No need to knead!
- 5 - Tuck in the bottom edges to form a round shape.
- 6 - Place the dough on top of parchment paper. Lift up the paper and place it into a large bowl. Cover with a towel or plastic wrap and let it sit for 30 minutes. Place a 4-6 qt dutch oven with the lid into your oven and set it to 450 °F. The pot should heat up for the entire duration of the dough resting time.
- 7 - Take the pot out of the oven. Pick up the paper with the dough and place it into the pot and cover with lid. Place the pot back in the oven for 30 minutes. Remove the lid and bake for an additional 8-12 minutes to crisp the top. Remove from oven and set out on a cooling rack.

Tips and Tricks:
- Make sure your water is hot, but not boiling hot or it will kill the yeast. You should be able to touch the water without burning your finger. The ideal temperature is around 120°F - 130°F.
- Let the bread completely cool before slicing so it can finish cooking inside. Also, use a rack so air can circulate underneath and prevent soggy bread.
- Use a serrated knife to make the bread easy to slice.
- This is a no knead bread recipe, so resist the urge to knead! The magic happens by letting the dough rest.
- Make sure your yeast is not expired or your dough will not ferment and rise.
- If your oven is not hot enough, the bread will not bake up properly. I highly recommend using an oven thermometer to ensure you're baking at the right temp.
What's the purpose of baking bread in a Dutch oven?
It conducts heat evenly and creates the perfect environment for your dough to bake in. By leaving the lid on, it traps in steam which gives the inside of the bread time to cook before the crust sets.
Then, removing the lid before the crust fully browns will release the steam and the crust will turn golden brown and super crispy! This whole process yields a soft center with the perfect amount of moisture and a crackly crust. It's foolproof!
Can I make it without a Dutch oven?
I prefer a dutch oven, but you can use any oven-safe dish or pot that has a tight-fitting lid and is big enough to fit the dough. Make sure to check the maximum temperature on the dish/pot before using it.
You can also try a glass baking dish with a lid, a heat-proof pot or bowl fitted with aluminum foil, Clay baker with lid or a pizza stone with a heat-proof bowl to cover. The idea is to create a steamy environment to help the dough expand without drying out the crust.
Can I use active dry yeast?
Yes! Just use ¼ teaspoon more than the instant (total ¾ tsp). Dissolve it in ¼ cup hot water (not boiling), along with ½-1 teaspoon of sugar. Let it sit for 5-8 minutes until it bubbles up. If it doesn't, then the yeast is dead, and you'll have to try another packet.
Now add the yeast mixture to the hot water in the recipe, but make sure to use ¼ cup less water (1 ¼ cups). Mix together and proceed with the written recipe.
How can I store it?
It's best to leave the bread out at room temperature in a bread box or in a paper bag so it stays crisp. Don't store it in the refrigerator or it will turn stale due to the starch crystallizing.
Artisan bread is freshest the same day but it will last for 2 days when stored properly. To refresh the bread, spritz crust with water and place directly on an oven rack that is preheated to 400 F.
Can I freeze it?
Yes! Just wrap it tightly in plastic wrap and freeze for 2-3 months. You can also slice the bread first before freezing, so you can just use what you need. Thaw on the counter, then warm in the oven on a baking sheet for 15 minutes at 35o F.
Ways to enjoy it:
- With a big bowl of soup
- For vegan fondue
- Sandwiches
- With a pat of vegan butter
- Alongside a big plate of pasta
- For dipping

I LOVE TO HEAR FROM YOU
If you make this Artisan Bread Recipe, let me know what you think by ★ star rating it and leaving a comment below. It would really make my day. You can also follow me on Instagram and share your creation with me. Just tag me @veganhuggs and hashtag #veganhuggs so I don't miss it.
Recipe
No-Knead Artisan Bread Recipe
Ingredients
- 3 cups + 2 tablespoons (390g) All-purpose flour , plus more for work surface (*see note)
- 1 ½ teaspoons sea salt
- ½ teaspoon instant dry yeast (or quick rise)
- 1 ½ cups (354 ml) water (hot but not boiling - about 120°F – 130°F)
Recommended Equipment
- 4-6 Quart Dutch Oven
Instructions
- In a large bowl, whisk together the flour, salt and yeast until combined.
- Stir in the hot water until just combined and a sticky and shaggy dough forms. Don't overwork the dough. Use a spatula to scrape the sides if needed. Cover the bowl with plastic wrap or a damp towel. Place the bowl in a warm spot in your kitchen (not too warm) and let the dough rest for 3 hours.
- After 3 hours, the dough will puff up and will be covered in bubbles. Before you begin, set out another large bowl and cut off a piece of parchment paper that will fit inside. Now, flour your work surface. Keep some flour next to you for your hands and sprinkling.
- Using a sturdy spatula, scrape the dough onto your work surface. The dough will be very sticky. Sprinkle the top with flour. Now, fold the dough gently in towards the center about 5-7 times, using a bench scraper or your floured hands. Tuck in the bottom edges to form a round shape. You don't want it to be too loose or it will lose its shape. (see step-by-step photos above)
- Now pick up the dough and place in on top of the parchment paper. Lift up the edges of the paper and place it into the large bowl. Cover with plastic wrap or towel and let it sit for 30 minutes.
- Now, place a dutch oven with the lid into your oven and set it to 450 °F (230 °C). Keep the pot in the heated oven for the duration that the dough is resting.
- When the time is up, carefully take the pot out of the oven. Set it down and open the lid. Pick up the paper with the dough and place everything right into the pot and cover with the lid. If the paper is sticking out of the pot too far, just carefully trim it (this avoids burning the paper). Place the pot back in the oven for 30 minutes.
- Now remove the lid and bake for an additional 8-12 minutes to crisp and brown up the top. Watch carefully to prevent burning. Remove from oven and set the bread out on a cooling rack. Let it completely cool for at least 45 minutes before slicing.
Video
Notes
Nutrition


Laura
Love this recipe- have made it at least 10x by now and it’s been great! If anything I would enjoy more in a loaf… can the recipe be doubled with more cook time? Thanks!
Melissa Huggins
Hi Laura, I'm so happy you love the recipe. I haven't tried it in loaf form yet, so I'm not sure what adjustments will be needed. I have it on my list, though and I'll report back when I try it. 🙂
Mason R
Amazing bread! So simple to do and this is seriously in line with any loaf you could get from a bakery
Melissa Huggins
Hi Mason, This is such a wonderful compliment! Thank you for trying the recipe and sharing feedback. 🙂
Jayne
I've always had trouble with bread but this turns out amazing. Thank you so much!! Perfect for tonight at -20 degrees.
Melissa Huggins
Hi Jayne, I'm so happy this one is a hit for you! Thanks for sharing feedback. Stay warm. 🙂
Roxane
This was my second attempt to make bread and it turned out great!!! Thank you for such an easy recipe!!!
Melissa Huggins
You're most welcome, Roxane! I'm happy you loved the recipe. 🙂
Sunita Chandarana
Can i use a corningware container ok for this please
Melissa Huggins
Yes, that'll work as long as it's safe at 450F which I believe most are. I hope this helps. 🙂
Deb
This bread is so easy to make and no fail. I sometimes like adding rosemary or seeds like pumpkin, sunflower or pine nuts. It’s also a nice change to sprinkle the top with sesame seeds before baking.
Melissa Huggins
I'm so glad this recipe is a hit for you. I love the your additions of rosemary and seeds. Sounds delish! Thank you for sharing feedback. 🙂
Carol
You do not list the sugar in the recipe ingredients. You do have it in the step by step instructions.
Melissa Huggins
Hi Carol, the written recipe doesn't include sugar if using instant yeast. If using dry active yeast, you will add the sugar to the warm water (that method is in the note section and in the blog post). I hope this helps. Let me know if you have any other questions. 🙂